Contents
Index
Write LandXML File
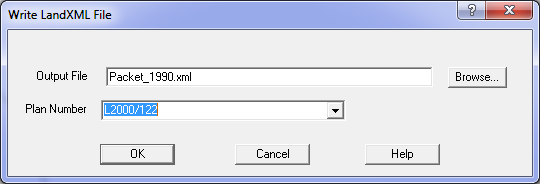
To write a LandXML file use the Conversions/LandXML/Export ICSM LandXML File menu option.
This option will write the data from a selected plan in the current job into a LandXML file.
The data will be in a format suitable for submission to the Titles Office as a Cadastral Survey Plan.
Note that a LandXML conversion can only be effected if a projection and zone are selected in "Job Settings".
See Job Settings
You must also have the correct config file set for your state.
This will set up all the menus for the extra items required by the Titles Office.
It is good practice to name LandXML files with a suitable filename to easily identify the file as a LandXML file
to avoid confusion with other cadastral xml files.
An example might be "LXML DP1234567.xml".
Preparing the data
In the plan properties, enter the plan heading in the Description field and then use the "Extra" button to display the extra attributes menu.
Information for most of the items can be taken directly from the plan form.
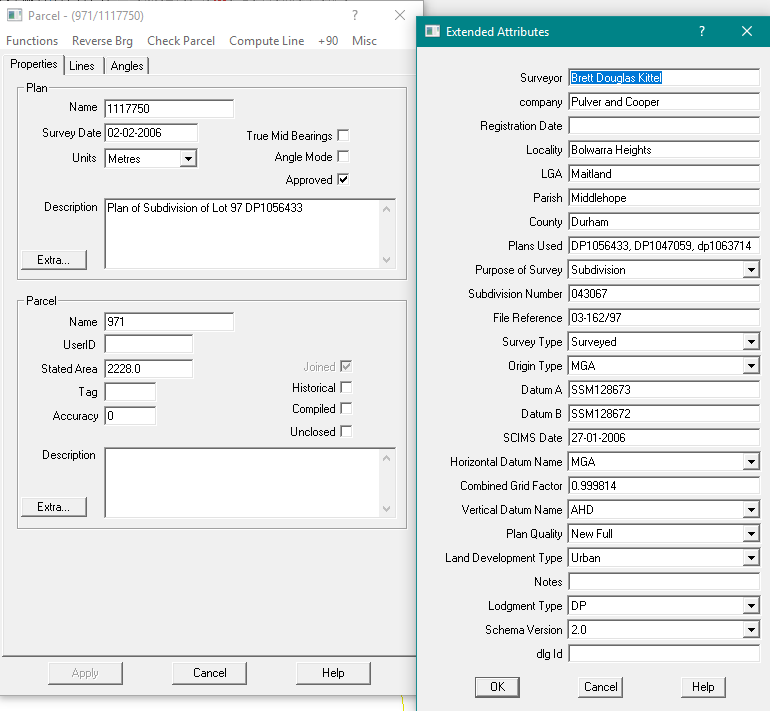
Many of the fields have drop-down menus of the appropriate key words for that field.
If the plan is of a survey (not compiled) and the terminal points of the datum line are Integration Survey marks, enter the names of the datum points.
Note that there should not be any imbedded spaces in the names.
If the plan is compiled you do not use the Datum A and Datum B fields, but you must put a note in the source field for the datum line.
For each parcel use the "Extra" button in the parcels field to display the extra attributes menu and set the extra attributes.
Then go to the lines tab where you will see extra columns to set data for the lines.
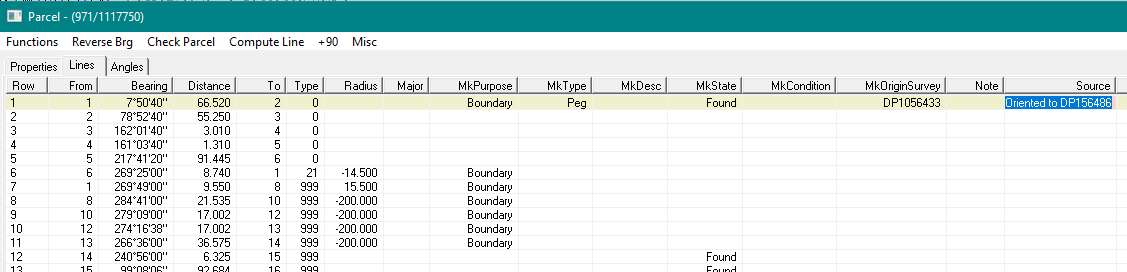
Point information such as MkPurpose, MkType etc., always refers to the "To" point in the line.
If the plan is compiled or on magnetic meridian, enter the datum information in the source field of the datum line (see highlighted source field).
If there is not a datum line specied on the plan, enter this information in the first line in one of the parcels.
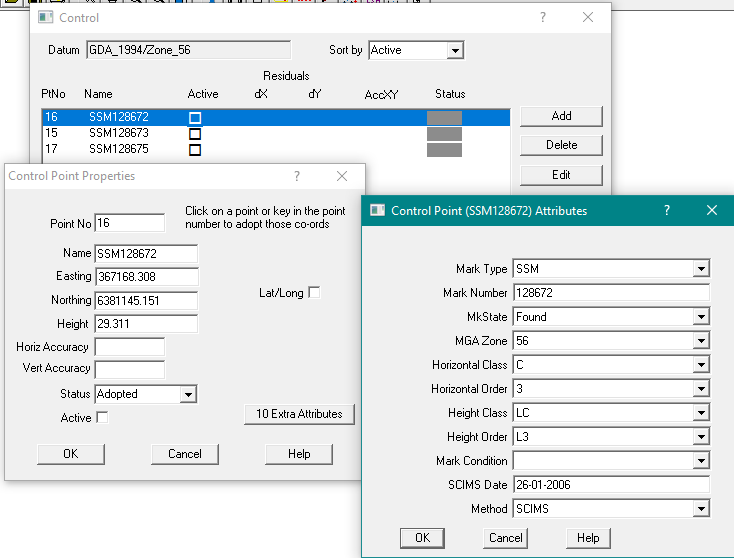
Edit each Control Point and use the extra attributes button to display the items required.
As with the plans, parcels and lines, most of the fields have drop-down menus with the appropriate key words for that field.
When all of the extra data has been added, export the plan.
Plan
You must select the plan in the job which is to be written to the LandXML file.
A LandXML file can only contain one plan.
The file will also contain information on the parcels around the selected plan
These will be used in the rendering process if a plan is drawn from the LandXML data.
Checks are carried out as the LandXML file is being assembled and if there is missing or invalid data, warning messages will be displayed.